The install process creates a configuration file
/etc/qle/qle.conf which must be edited. This can be done with your favorite text editor, however, the file is protected against writing by a non-admin user. The file might be edited with something like:
sudo gedit /etc/qle/qle.conf &
There are two lines that must be changed. At line 63 of the file, you will find the lines:
#
debug = 0
#
myCall = N0CAL
#
Be sure that the
debug line is set to zero and change the
myCall line to reflect your callsign.
The second line that must be changed is at line 75 where you will find:
# Filename of SQLite DB with full path.
# This file requires sufficient RW access for the DB to work...
#
db = foo3.db
#
# Name of the table that you want to log into.
# Is probably case-sensitive:
#
tableName = mycall
#
You must change the name of the database to your desired name and location.
qle is set up for a single user system, so all users share the same database. You must place the database in a location where it can be accessed by any users requiring it. If you always log on with the same usercode, you might choose to put it in a hidden subdirectory off your logon directory, for example, ~/.qle. This is the simplest approach, but in some circumstances, you may prefer a more "global" location, for example, /etc/qle. In this case, you need to take care to give the file appropriate protections.
For simplicity, we will assume that
qle will only ever be run from a single usercode and we will put the database there. Reflect that location and name in
qle.conf, for example:
db = /home/usercode/.qle/qle.sqlite
Note that you cannot use the tilde (
~) within the config file, you must enter the entire path.
There are many things you may wish to change. For example, at line 101:
#
useRig = 1
#
determines whether you want to use the rig control library,
hamlib, which can be a great convenience if you have the appropriate hardware.
At line 225:
#
noCwDaemon = 0
#
determines whether you wish
qle to have the capability of keying the transmitter.
To avoid describing hamlib settings and hardware setup, we will assume these are both disabled for now, that is, useRig=0 and noCwDaemon=1.
After editing
qle.conf, you need to create the database. There is a sample database in
/usr/share/qle so we can copy that to the location we have specified for our database:
cp /usr/share/qle/foo3.db ~/.qle/qle.sqlite
This file has some test data which we will delete after some initial testing.
3.1.3. Running qle for the first time
The first time you run
qle, it should be done from the command line in debug mode to be sure you made no errors in the config file:
qle --debug=1
If there were errors editing the configuration file, they will appear in the window from which you started
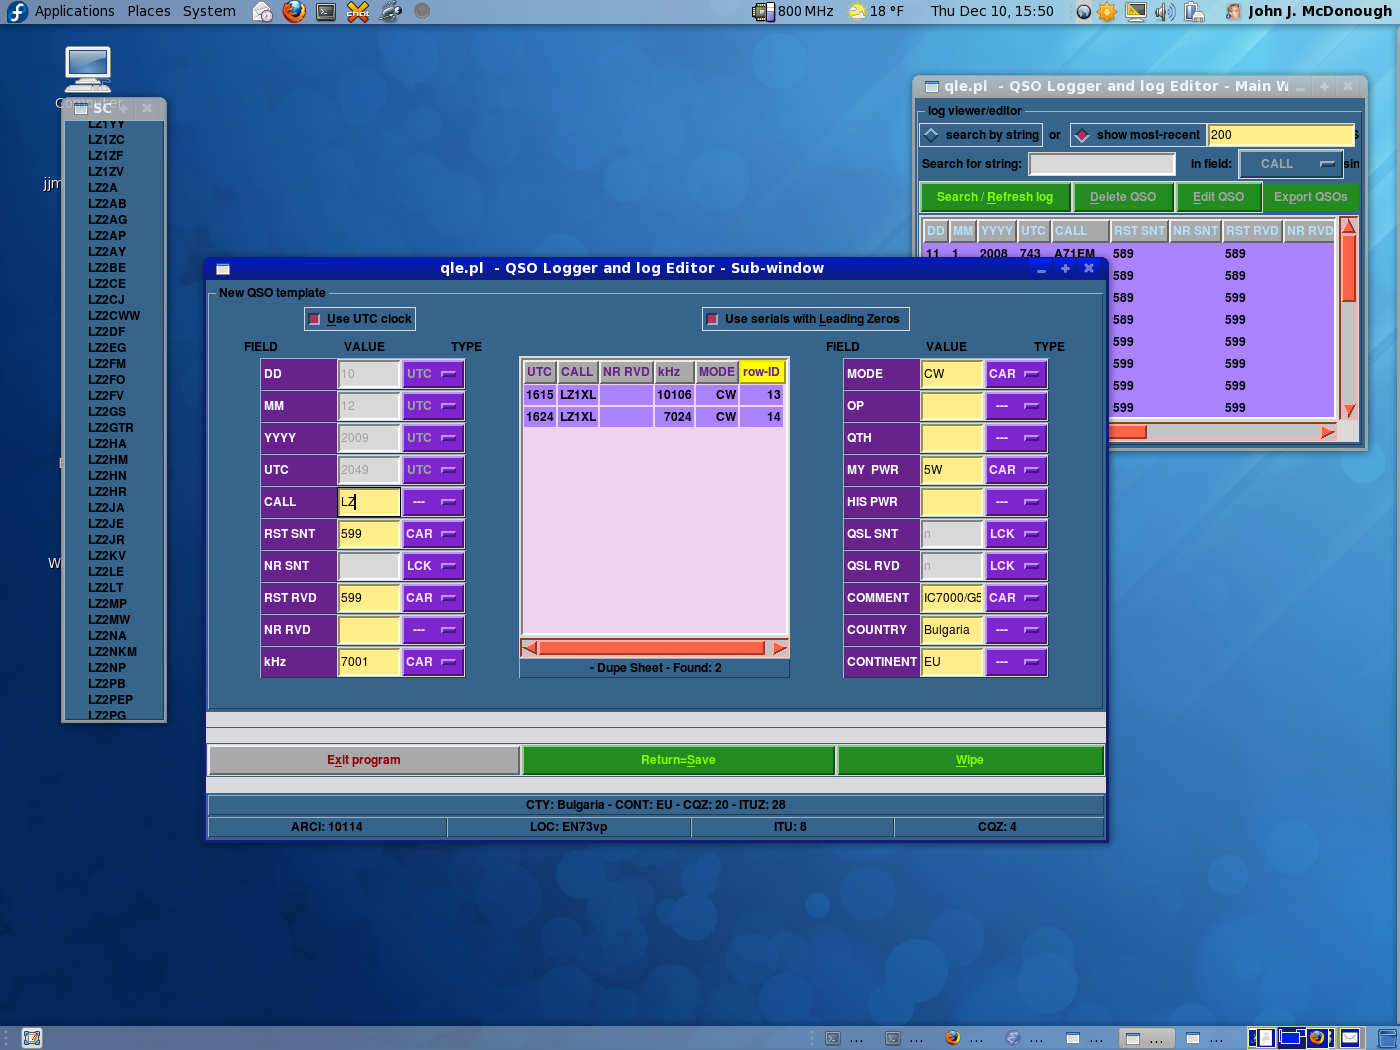
qle. If all went well, this should result in seeing the logging windows with the test data displayed:
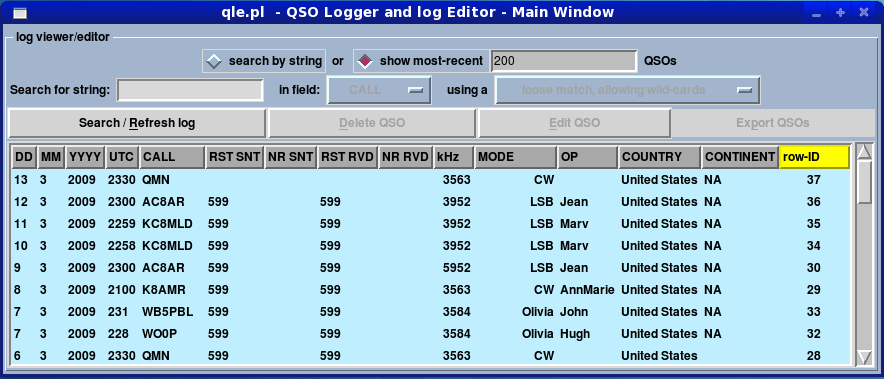
The qle "Main Window" shows the QSOs that have been logged so far. It will contain QSOs from the sample database. We will delete those QSOs later.
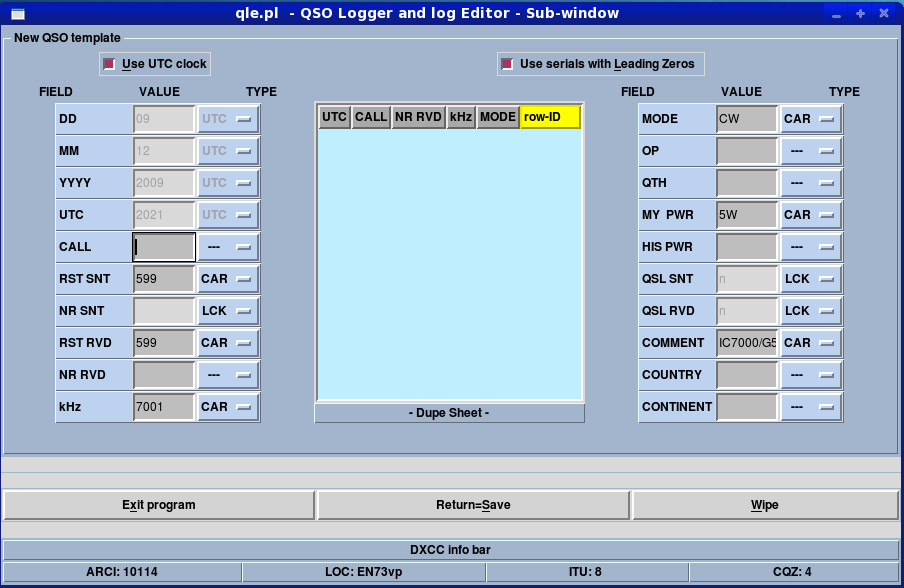
The "Sub-Window" is actually where the data will be entered for each QSO. Some fields are provided automatically, such as the date and time. These will be a lighter color than the other fields. Each field has a button to the right indicating how that field is to be treated. Fields that have the label CAR will be carried over from QSO to QSO. These can be overwritten, but will initially be filled in with data from the previous QSO. These are things like Mode, Power, etc that tend not to change.
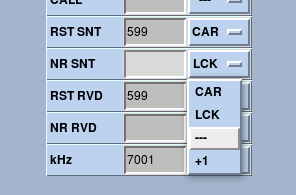
If you wish to change the data in a field that has the label LCK, you may simply click on LCK and select another choice from the dropdown. Normally, you might choose --, but if you are contesting, the NR SENT field includes a +1 choice.`
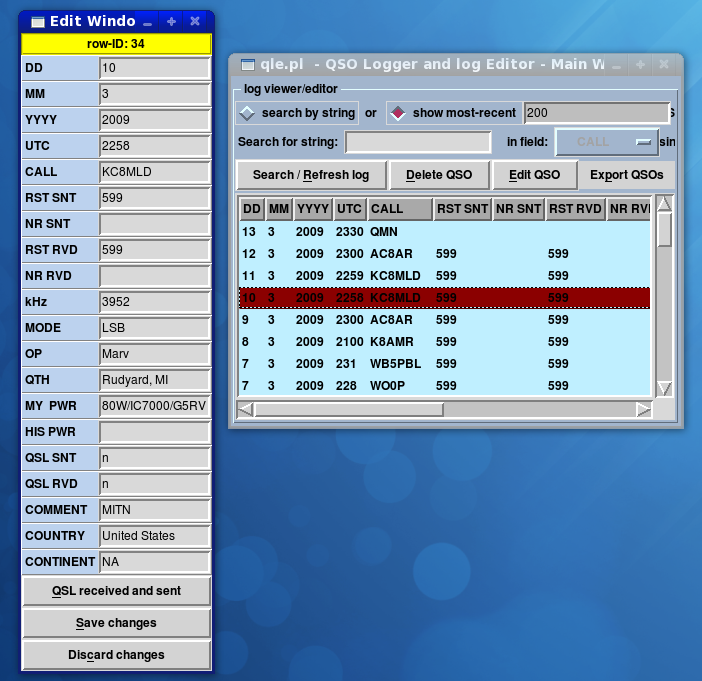
If you double-click an existing QSO in the Main Window, an Editing Window will appear, allowing you to make changes to the existing QSO.
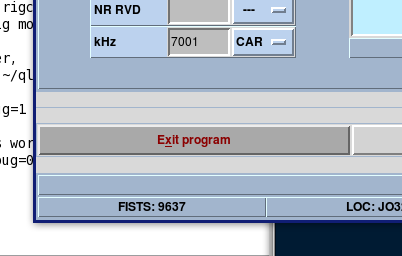
To exit the program, click the
Exit Program button at the lower left of the subwindow.
qle will ask for confirmation when exiting.
3.1.4. Deleting Sample Data
Now that you are familiar with the basic operation of
qle, you will want to delete the original sample data so the database only contains your QSOs. Since the data is in a
sqlite database, we merely need to use some simple commands to do that:
[jjmcd@Aidan .qle]$ sqlite3 ~/.qle/qle.sqlite
SQLite version 3.6.20
Enter ".help" for instructions
Enter SQL statements terminated with a ";"
sqlite> DELETE FROM mycall;
sqlite> .quit
[jjmcd@Aidan .qle]$
If you are familiar with SQL, you can also use
sqlite to make other changes and queries.
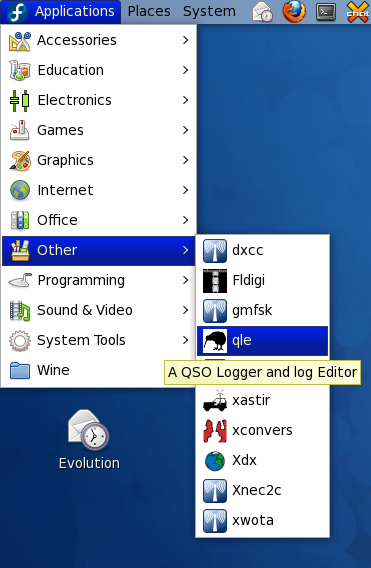
You are now ready to begin using
qle. By default,
qle is available on the
Other submenu of the
Applications menu.
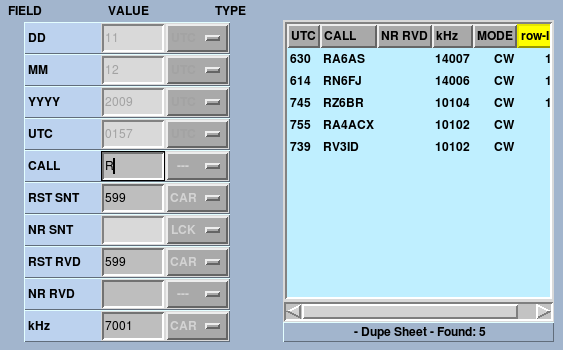
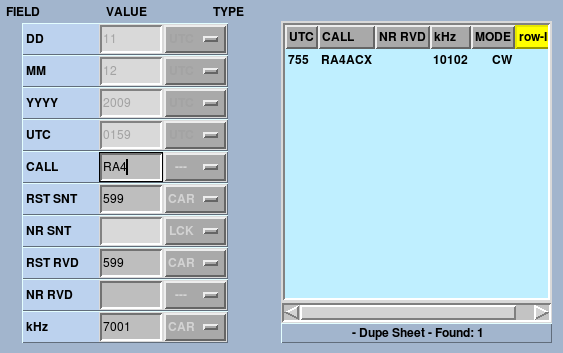
3.1.5. Duplicate Checking
qle provides duplicate checking as the call is entered. When the first character is entered, any calls in the log that match are shown in the duplicate window:
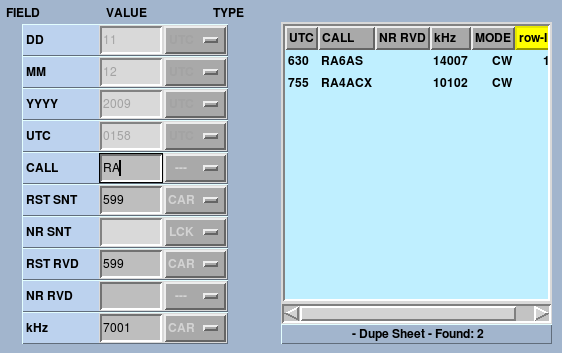
As additional characters are entered, the list gets shorter:
In addition to the current log, the file
/usr/share/qle/master.scp contains a list of calls to check. These are shown in a separate SCP window:
Like the dupes window, this list gets shorter as you type. Edit
master.scp to include the calls you want.
3.1.6. Some customizations you probably want
qle is highly customizable. In the previous sections, we described a few things that definitely need to be changed. There are quite a few more you probably want to change.
At the bottom of the secondary screen you will notice a bar with some information:
This bar is simply a reminder for some random data you may want to keep handy. You can change the information by editing the lines starting at line 1051 in the configuration file:
infoString = "ARCI: 10114"
infoString = "LOC: EN73vp"
infoString = "ITU: 8 "
infoString = "CQZ: 4 "
You may find that you want the default field types to be different. For example, suppose you constantly change power and you don't want the previous power to be shown by default. At line 384 of the configuration file is a line for each field with the default type. You can simply change this to make
qle start with the type you desire:
fieldTypes = "---" # mypwr
You can even adjust individual colors to make them as appealing (or as horrible) as you prefer:
There are literally hundreds of adjustments you can make to tailor your logger to behave exactly the way you want. Just be sure to carefully review the comments in qle.conf so you don't get unexpected results.